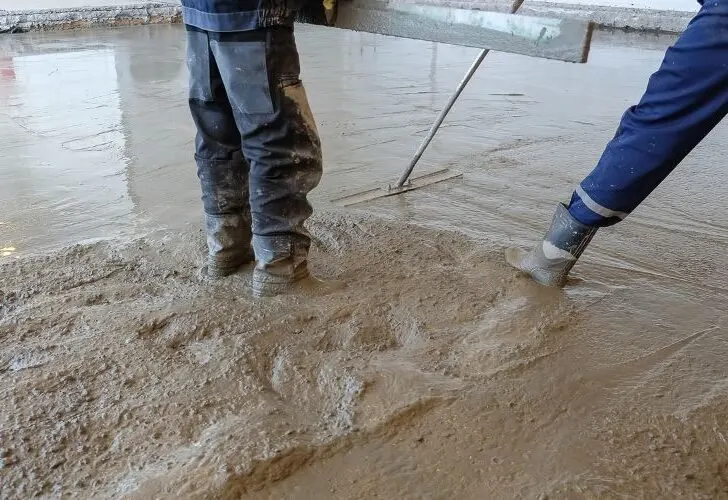
You can rightly consider concrete one of the world’s most durable and attractive building materials.
But did you know that how you pour it and everything you do after pouring has as much impact on its strength as the mixture itself? Therefore, how do you go about pouring concrete? Is it once, or can you do it in stages? Read further to find out.
If you want a successful and uniform realization, you must pour the slab in one go. Therefore, pouring all the concrete before it dries would be best. On the other hand, you can pour the first layer of concrete and set up the welded mesh before pouring the second mesh; however, this isn’t the best option because you may have a cold joint.
Is it Okay to Pour Concrete into Layers?

Pouring concrete in layers isn’t always what the experts recommend.
However, you may decide to go about pouring your concrete in layers, but make sure you equalize the heights of the different layers over their surfaces, using mason’s rule.
Firstly, ensure you do the curing immediately after pouring the concrete; failure to do so in time will make the water in the concrete evaporate too quickly, resulting in dehydration.
Dehydration will make the cement particles that formed the gel-lack sufficient cohesive force, appearing on the concrete surface and making the flakes or powder fall off.
In addition, when the concrete does not have sufficient strength, the premature evaporation of water will also cause large deformation and dry shrinkage cracks.
Therefore, it is very important to maintain the initial stage after pouring the concrete, and the curing should follow immediately after the final set of concrete.
Again, factors such as engineering structure, cement variety, environmental and climatic conditions, and concrete mix ratio can affect the curing time.
Taking into account the particularity of the construction environment in winter, you are to use a brush curing agent with mold curing.
Lastly, if you are using Portland cement, either ordinary or slag, the curing time at normal temperature should not be less than seven days.
When using many mineral or retarded admixtures, the curing time should be more than seven days but less than 14 days.
For projects with durability requirements such as frost resistance and impermeability, the curing time should not be less than 14 days.
Can Concrete be Poured in Sections?
You can pour concrete in sections. It has many advantages that some experts recommend doing it always.
One major benefit is that pouring your concrete in sections can lengthen the life of your concrete. Another benefit of sectioning is completing it on your own before the cement hardens.
Therefore you don’t need to engage a large team of workers to do the work for you. Here are some other benefits of pouring concrete in sections.
- Avoiding cracks
- Longevity
- Detailing and surfacing
- Easy repair.
How do you Pour Concrete in Phases?
Below is the step-by-step guide on pouring concrete in phases.
#1. Locate and Prepare the Location
To do this, delimit the excavation location by positioning strong stakes at each corner and connecting them using a cord.
You must measure the surface well and mark it out with pegs. After tracing, you will move on to disbursing and leveling the ground.
#2. Cash Out
The excavation depth must be at least 20 centimeters, knowing that a slab protrudes, in general, by an average of 5 centimeters from the ground level.
Depending on the ground’s surface, you can carry out this operation with a shovel, a spade, or a digging machine (e.g., a mini-excavator).
#3. Level
Once you excavate the ground, check the regularity of the bottom of the excavation using a mason’s ruler and a spirit level, and correct it; excavate the ground, or backfill, where necessary.
#4. Make the Hedgehog
On the surface, continue by spreading a bed of stones or ternary about ten centimeters.
Spread this “hedgehog” with a rake’s help, ensuring its leveling. It is the hedgehog that will form the base of the concrete slab.
#5. Make the Formwork
The formwork is the structure where you pour the concrete slab. The installation of formwork allows concrete to dry completely.
To make an old formwork, you need to use boards with a width and thickness of 80 and 27 mm, respectively.
Position the boards vertically, leaning them against the stakes. Ensure that the lower and upper ends coincide with the slab’s surface. Use a little formwork oil to remove the boards.
#6. Seal
Position a polyethylene waterproofing film over the entire hedgehog area using the shuttering boards to protect your floor from rising dampness.
Do not hesitate to overlap the strips over several centimeters to increase their effectiveness.
#7. Provide Dilation
It is normal for concrete slabs to crack with temperature variations. Dividing the concrete into sections is necessary to avoid lifting and cracking separated by expansion joints.
There are two solutions to this. First, remove the 8mm thin oiled boards once the slab has dried, and fill the spaces with polyurethane mastic. Secondly, leave the PVC expansion joints even when they dry.
#8. Frames Assemblage
Position the concrete at the bottom of the formwork so that the trellis isn’t on the ground. Lay the wire mesh at the bottom of each area of the formwork.
Use tying wire to assemble the tablecloths. Cut the edges with a grinder, ensuring the mesh is at least 8 cm away from each formwork board. It must be completely coated in the preparation.
#9. Pour and Pull the Concrete Slab
Once you finish the preparation in the cement mixer, pour some of it into a wheelbarrow, and use it to fill your formwork. Equalize by “pulling” the concrete using a mason’s ruler.
Concrete can gradually harden and increase its strength because of cement hydration, and the hydration of cement requires certain temperature and humidity conditions.
If this condition doesn’t exist in the surrounding environment. Artificially concrete curing creates certain humidity and temperature conditions so that the freshly poured concrete can normalize and accelerate its hardening and strength growth.
You can cure concrete either by; limiting the evaporation or adding water to the surface of the concrete.
Curing is particularly necessary for horizontal surfaces (case of ready-mixed concrete for paving, slabs, screeds) with a large evaporation surface.
Below are the risks associated with the absence of a cure.
- Failure to cure is likely to cause the following negative effects on the concrete/mortar:
- Visible effects on the surface of the structure.
- Risk of cracking due to excessive plastic shrinkage (phenomenon identical to clay soil drying).
- Poor quality surface.
- Poor hydration of the cement on the surface.
Can I Pour Concrete Over Two Days?
If you don’t finish pouring concrete within a day, you’ll face a cold joint between the two concrete castings, which may lead to improper bending.
On the other hand, when you have no solution other than to do it in two days, you are to apply a concrete bond chemical material on the joints.
Notwithstanding, ensure to apply it before you start the next concrete casting.
Applying the chemical bond may guarantee a full bond and also prevent the removal of any loose concrete.
Yet, it’s always better to finish pouring concrete within a day to avoid having cold joints or further cracks.
How Long can you Wait Between Concrete Pours?
Since it takes 24-48 hours for the concrete to partially dry, never wait until about 24 hours before you pour another phase of concrete.
However, you should note that concrete goes through three phases to move from a “fresh” state to a “hardened” state.
The phases are as follows.
#1. The Dormant Phase
It’s the first phase and starts after about an hour (depending on the weather) of pouring the concrete. This phase allows people to walk on the concrete as they desire.
#2. Setting
After about two hours, the viscosity of the concrete increases. The second phase involving drying begins.
#3. Hardening
The concrete freezes, and its mechanical resistance increases gradually. At this stage, a vehicle can comfortably drive on the concrete.
Can you Pour Concrete on Dirt?
It is not a good idea to pour concrete directly onto the ground before leveling it. At the very least, you should level and compact the subgrade to prepare the ground completely.
To obtain the weight of the final slab, you can add some gravel to the sub-base.
It’s a common misconception that you can add anything to a concrete mixture due to the aggregate’s rough appearance, which contributes significantly to the structural rigidity of concrete.
Furthermore, you should be aware that any significant addition of any element can affect the long-term integrity of the concrete.
Therefore, before you pour the concrete, ensure no external influences (such as loose dirt, tree roots, leaves, or grass) to prevent changing the ratio of cement, water, and aggregate.
What Tools do I Need in Preparing Concrete?
Here is a list of tools and their uses that can be useful during concrete work.
| S/No | Tools | Application |
|---|---|---|
| 1 | Round shovel | For ground excavation |
| 2 | Square shovel | For picking up concrete that fell on the ground. |
| 3 | Carpentry tools such as hammer, nails, and saw). | For your formwork |
| 4 | Large hammer or sledgehammer: | Drive and reinforce spikes to hold the formwork in place. |
| 5 | Level and ropes | For leveling |
| 6 | Construction-style wheelbarrow(s): | For packing and moving the concrete |
| 7 | Oil | To oil your formwork |
| 8 | Concrete vibrator | For wall or foundation work, very useful for placing concrete in inaccessible places. |
| 9 | Trowels | Trowels |
| 10 | Garden rake | The most useful tool for leveling concrete. More useful than a shovel for moving concrete over short distances. |
| 11 | Leaf rakes |
Conclusion
Because concrete poured differently can cause cold joints and cracks, most likely to cause damage.
Therefore, do your best to pour concrete at a time to prevent unnecessary damage. The fact that you may pour concrete in stages shouldn’t delay you in doing the job.


