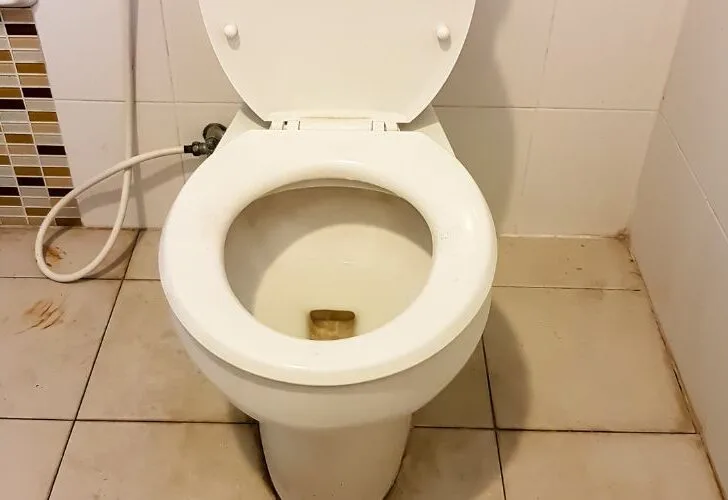
A toilet falling through the floor is scary, and it might’ve come to your mind if your bathroom floor had seen better days.
But, even if it seems like it can’t be possible, you have to be sure; so, is it possible for your toilet to fall through your floor?
A toilet can fall through the floor in rare circumstances. However, if the flooring used in your toilet is weak and the soil underneath it starts to soften, then there is a higher chance of it your toilet falling through the floor.
Can a Toilet Fall Through the Floor?

Yes, your toilet can fall through the floor due to softened soils, leakages, or several other reasons.
Although before your toilet falls, several signs indicate that the flooring would no longer be able to support the weight of your toilet.
Some reasons why your toilet may most likely fall through the fall include;
#1. Soft Floors
If you notice that the areas around your toilet seat are becoming soft, that is a clear sign that it is about to go down very soon; you should act fast by getting a plumber to prevent severe damage in the long run.
#2. Leaks From the Toilet
Leaks from the toilet seat are another clear sign that can lead to your toilet falling into the floor.
If you notice that the toilet has gotten loose and shakes when used, you have a significant leak that you need to attend to immediately!
#3. Rotting
There are a lot of signs to show that your toilet is rotting and ranging from mildew to foul odors from the toilet.
Some of these clear rotting signs that show that your toilet may likely go down anytime soon include molds, odors, and warping.
Even if your floors seem in bad shape and can’t be fixed, do not worry; you can ensure that your floor returns to its original shape by calling on a professional to make a few adjustments.
Can a Bathroom Floor Collapse?
Your bathroom floor can collapse when you subject it to certain factors. One of the most challenging parts of having a home is knowing that one of the parts of the home is affected, either the electrical or plumbing sector.
The bathroom has to be one of the areas around the home where you use water the most, so it is more susceptible to water damage around the wall and even the floors.
When moisture starts getting into the bathtubs and on the walls, it enhances the growth of molds and mildews, which eventually get onto the floor and soften it until it collapses.
Although most owners know that water damage and destroy the floors, they are unaware of signs to watch out for to avoid this. One significant sign you should watch out for is the musty smell.
If you notice that your bathroom still has a musty smell after several cleaning times, there is a high possibility of a mildew or mold build-up somewhere.
If these molds and mildews are allowed to keep thriving, they can damage your walls and eventually break down your floors and soften them.
Some other common signs you should look out for to prevent your bathroom floor from collapsing include;
- Rocking toilet seats. Your toilet seat rocking or shaking when in use indicates that the floor is no longer strong enough to support its weight.
- Squeaks from the floorboard.
- Noticeable cracks on your floorboard.
- Bubbling up from your linoleum floors.
How to Fix Collapsing Bathroom Floors?
You can fix your water-damaged bathroom floors all by yourself with just a few tools and some steps. Some of the tools you would need include;
- Leather gloves and eye protection.
- Jigsaw.
- Circular saw and handsaw.
- Paintbrush, tape measure, and belt sander.
- Replacement wood joist.
- Cat paw and a hammer.
- Carpenters square.
- Repair ring or repair plate.
- Galvanized nails.
- Carpenters square.
Steps To Take
- Completely turn off the water from any source producing water from your work area; you won’t need more water coming in as you work.
- After that has been done, the next thing you would need to do is prep the area. First, ensure that you get your gloves on and put on your eye and dust protection before you begin. Next, remove everything sitting on the work area from the toilet seat to the bathtubs so you can have a clear work area.
- After that, remove the nails from the floorboards and get the boards out of the floor, and if the flooring is widespread, you may even need to get rid of the entire floorboard.
- Next, inspect the area and use your pencil and straightedge to draw lines to signify where you need to work. You can now use your carpenter square to connect those lines; by doing this, your work area is securely guarded.
- Remove the joist from the floor and then figure out damaged areas. You can now install your floorboards or concrete and hold it down properly to the floor. If the area is wet, give it time to dry off, about a few days.
- Ensure that there are no gaps, and after the floor has completely dried off, you can now apply your tile if desired.
How Do You Reinforce a Floor Under a Toilet?
A weak and spongy floor is widespread in toilets and bathrooms that have endured a lot.
In typical cases, toilets are installed between two joists and upon a plumbing flange. A vertical drain line known as a riser is permanently attached to the lower edge of the flagger.
Most home builders install additional wood blocks between the joists around the riser area. So, you can successfully reinforce the floor under your toilet, follow the following steps;
- First, you should ensure that you have your safety gloves and Google. Then, after you have protected yourself, you can locate a basement or underground method to get to the plumbing drain below your toilet.
- Most oiled drains are 3-4 diameters wide and usually have a P trap just below the toilet so when you get down, measure the distance between the floor joist and the area of the riser; ensure to add 1/16 inches to each measurement so the locks can fit in tightly.
- Install a tube of construction adhesive in the caulking gun and apply a large amount on one of the two-inch-wide edges of the block. The edge that you used the adhesive on should be the upper edge that fits the underside of the subfloor.
- You should install each block between the floor joist at each side of the riser with a hammer. Each of these blocks is three inches away from the corresponding side of the riser.
- Drive the lower edge of your block upwards with a hammer until the edge with adhesive is firmly set against the underside of your subfloor.
- You can now secure the blocks by driving two framing nails at each end.
How to Secure a Toilet to the Floor?
It would be best if you caulked your toilet to the floor to prevent it from moving left and right when in use.
If you do not work on this problem immediately, it develops over time and becomes a bigger problem for you in the future.
To secure your toilet to the floor, you would need;
- Utility knife.
- Shims.
- Tub and tile caulk.
- Paper towels.
Procedure
#1. Check The Bolts
Something might need to tighten the two flange bolts or the closet bolts, which will securely hold your toilet again.
However, you must be careful because tightening the bolt too much can crack the brittle porcelain part of your toilet; there is no repair for cracked porcelain!
#2. Checkout For Leaks
Check the areas around your toilet for water leaks. For example, leaks from the toilet seat simply mean the wax ring that holds the toilet horn to the flange has become old and needs to be changed.
#3. Lookout For Gaps
If you notice any gaps between the toilet seat and the floor, this should be why your toilet seat is not held steadily to the ground. Insert a shim down the gapping hole to see how far the hole goes.
Ensure that you hold the shims upright and stick them into the hold on both sides of the toilet seat.
You can place these shims in and sit on the toilet seat and try to rock it to see it with the plastic shims in; the rocking stopped.
When your toilet seat is finally sturdy with the shims in, you can now use the utility knife to cut out the excesses. Be careful with this, so you do not eventually cut the flooring.
#4. Caulk Application
Apply a thin and even layer of caulk on both sides to further cover the gaps and hide the shims.
You can use your fingers to smoothen the caulk and then use a paper towel to wipe out excesses; wait for the caulk to dry, and once it finally does, your toilet seat should be as sturdy as new.
| Materials to Tighten a Loose Toilet Seat | Procedure |
|---|---|
| Screwdriver | Find the loose bolts. |
| Pliers | Tighten these lots with your screwdriver after tightening from up; to tighten from below. |
| Ratchet wrench | Replace the bolts, if the old ones are too old |
Conclusion
It would be best if you did not consider this a minor issue when you notice that your toilet floor is becoming too soft or your toilet seat is rocking to the left and right.
Instead, you should immediately fix it because if left for long, it is not beneficial to your health and can also serve as a breeding place for harmful insects.


