Problems with your Gilmour sprinkler can be very frustrating, especially during the summer when it’s most needed. This gardening tool does the hard work of keeping your lawn well-watered and flourishing.
Thus when it isn’t rotating, you will need to find out the cause and possible means of troubleshooting the problem.
Your Gilmour sprinkler won’t rotate if the head is stuck. Clog from growing algae, dirt, or grasses can accumulate in the head and its parts, preventing the sprinkler from rotating. Also, the water pressure contributes to the functioning of your sprinkler. Very low or high water pressure will cause your Gilmour sprinkler to malfunction.
Why Won’t My Gilmour Sprinkler Rotate?
 1")
Several factors contribute to Gilmour sprinklers not rotating. First, this device works based on a gear drive technology.
This technology is the driving force that pushes water consistently out of the assembly.
It consists of gears, valves, and other mechanical components, which makes them susceptible to wear and damage.
And like any other mechanical device, the moving parts will likely fail and get stuck. Accumulating debris in the head is one major factor preventing the sprinkler head from moving.
Also, there are other contributing factors. Below are some of the reasons your Gilmour sprinkler isn’t rotating:
#1. Obstructions
A Gilmour sprinkler won’t rotate if there are obstacles clogging the components in the head.
For example, due to frequent use, stones, growing algae, tree branches, or dirt can fill up between the sprinkler body and the riser.
This obstruction can interfere with the gear unit and cause unnecessary rubbing, preventing the head from moving adequately or not moving at all.
#2. Water Pressure
The pressure of water can determine how well your Gilmour sprinkler will function. A pressure that’s too low or too high can be problematic.
If the water pressure is below average, there won’t be enough pressure to move the head.
Furthermore, very high pressure will produce a force that’s too strong, causing the gear to work against its design. This force can lead to the head moving in erratic motion or not moving at all.
#3. Wear and Tear
Continuous use and exposure of your Gilmour sprinkler outdoor can wear any part of the system down. Also, damage can occur to the sprinkler head and prevent it from rotating.
For example, if the sprinkler’s riser is cracked or faulty, it can prevent the rotating motion of the head. In addition, a loose spring can stop your Gilmour sprinkler from rotating.
#4. Error In Assembling
Assembling errors are common mistakes people most likely ignore. When assembling, you have to make sure you place every part according to the Instructions.
Forcing everything quickly together will lead to malfunctioning, which might involve the head not rotating.
Five Reasons Why Gilmour Sprinklers Get Stuck?
A stuck sprinkler head is a common problem for gardeners. Gilmour sprinklers get jammed from time to time from the build-up of debris and some other reasons.
Knowing the reasons can help you prevent the problem in the future. Below is a table showing the reasons your Gilmour sprinkler head doesn’t move and possible solutions:
| Reasons Your Gilmour Sprinklers Get Stuck | Possible Solution |
|---|---|
| Internal Damage | Change damaged parts |
| Clogged Filter | Clean filter regularly |
| Clogged Supply Tube | Unclog the supply tube and clean off the dirt |
| Damaged Sprinkler Head | Replace sprinkler head |
| Water Pressure | Adjust to the proper pressure |
How to Fix a Gilmour Filter That Won’t Rotate?
Fixing a Gilmour sprinkler head that won’t rotate isn’t always a complicated task.
You can troubleshoot the problem yourself before thinking of replacing the head or calling a technician.
However, if the problem persists, don’t hesitate to call a technician to prevent further damage.
Below are ways to fix your Gilmour sprinkler that won’t rotate:
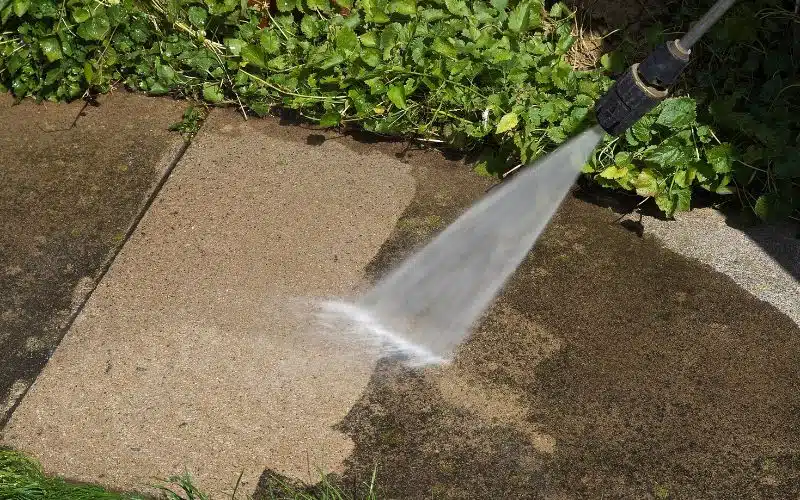
#1. Clean the Clogged Parts
A clogged filter or supply tube will cause the head of your Gilmour sprinkler to get stuck. You’ll have to clean these parts of stones, sand, or debris.
Also, regularly cleaning the sprinkler head will prevent it from getting stuck. However, clear your working area and ensure it is hazard-free before you start working.
Ensure you disconnect your Gilmour sprinkler from any electrical connection. Also, turn off the tap and valves.
To disassemble the head, do the following:
- Rotate the head anticlockwise, then unscrew it with a flat screwdriver. You can purchase the flat screwdriver here on Amazon.
- Place the head in a bucket of water and rinse it thoroughly.
- Gently insert a pin or small needle into the nozzle to loosen any dirt.
- Next, you’ve to clean the filter. You will find the filter under the head. Use your fingers for popping it out, or use a flat screwdriver or a plier. You can purchase the plier here on Amazon. Make sure you handle it gently to prevent damage.
- Then use a brush to remove debris from the filter before rinsing it in water thoroughly.
- Clean the supply tube also
- Finally, assemble the whole system gently.
#2. Adjust Water Pressure
Low or high pressure will affect how your sprinkling system works. If the pressure of your water system is too low, increase the pressure of the faucet to a reasonable force that will rotate the sprinkler’s head.
Furthermore, suppose the pressure is way more than your design can manage; in that case, it will render the moving parts of your sprinkler ineffective.
Decrease the pressure and check for changes. Also, you can install a water regulator to manage it.
The water pressure necessary to move your Gilmour sprinkler head depends on the model.
So, you’ve to check for this when purchasing your sprinkler. Ensure you purchase the design that will work together with your water pressure.
In addition, check out for leakages in your sprinkler or hosepipe, as this can affect the water pressure.
#3. Adjust Misaligned Parts and Replace Damaged Parts
When cleaning your Gilmour sprinkler head, check to see if any parts are misaligned or damaged.
Then, rearrange the misaligned parts correctly while you will have to replace damaged parts. Ensure you buy the correct replacement parts, preferably Gilmour replacement parts.
#4. Replacing a Damaged Head
A damaged head would need replacing. When purchasing a new head for your Gilmour sprinkler, make sure you buy the right design for your model.
The right design will fit into the nozzle. To fix the head, do the following:
- Make sure you turn off the water supply before you start.
- Unscrew your sprinkler head with a flat screwdriver in an anticlockwise direction.
- Fix the new sprinkler head carefully. Screw it tightly on the stem without cranking it down.
- Raise the cap and fix the nozzle on the head. Wind it carefully on the stem.
- Finally, check if it’s functioning correctly.
#5. Try a Sandpaper
Use grit sandpaper to rub gently on the moving parts of the sprinkler head. The paper will create friction and allow better movement of your sprinkler head.
Avoid using lubricants as this can attract dirt, creating further problems in the future.
How to Set Up a Gilmour Sprinkler?
Proper setting up your Gilmour sprinkler is necessary to achieve the desired result.
#1. How to Set Up an Adjustable Circular Sprinkler?
A circular sprinkler will water a sizeable rounded lawn effectively. To set it up, do the following:
- Flip the trip lever up to have your sprinkler head rotate in full circle for full coverage of your lawn.
- Lower the trip lever to adjust the sprinkler to water a particular part of your lawn.
- Move the left back collar to change to the font right sprayer.
- Move the right back collar to change to the back left sprayer.
- Move the sprinkler head left or right to set it before turning the water on.
- Set the spray distance by turning the dial. Place your fingers on the indentation on the front to turn the knob. Use your fingers to keep the sprinkler arm away from the water stream to keep from soaking yourself.
- Turn the diffuser pan to control the intensity of the spray.
#2. How to Set Up an Adjustable Length Rectangular Sprinkler?
A rectangular sprinkler allows you to water a rectangular-shaped lawn with gentle sprays.
It’s excellent for new grasses. Using a rectangular sprinkler is much simpler. Follow these steps:
- After determining where you want to water, turn the dial on the base to control where your water will focus.
- Turning the dial left or right will sway the sprinkler from the center to the far left or right.
- Turning the dial to the center will sway the sprinkler within the nearest distance from the center in both directions.
- Turning the dial to full will sway the sprinkler left and right for maximum coverage.
Conclusion
Regular cleaning of your Gilmour sprinkler is essential to prevent the device from getting stuck.
Also, ensure you use the correct water pressure for your design. In addition, replace all damaged parts with the right design for your model, preferably Gilmour replacement parts.
If you can’t fix a part properly, call a professional to prevent further damage.