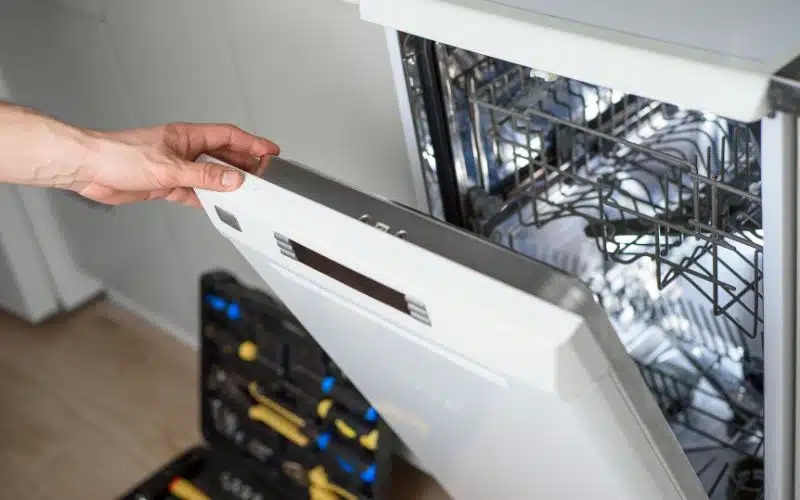
It can be frustrating when your dishwasher is acting up, especially when you’re not certain about what the cause of the malfunction is.
That is why the Kenmore dishwasher diagnostic mode is quite handy; with the diagnostic mode, you can figure out the exact cause of your dishwasher malfunction.
The goal of the Kenmore dishwasher diagnostic mode is to zero in on the exact reason why your Kenmore dishwasher is acting up. Several error codes display on the panel or through the machine’s lights.
Where Do I Find The Error Code On My Kenmore Dishwasher?
 1")
Kenmore dishwashers now come with built-in diagnostics systems; if your dishwasher is malfunctioning for whatever reason, you can determine the error on your dishwasher and proceed to fix the issue.
If there is a fault or error on your Kenmore dishwasher, certain LED lights on the dishwasher will blink to alert you to the fault.
Usually, the LED lights blink or flash because Kenmore dishwashers do not have error codes. Since the dishwashers do not have error codes, the blinking lights on the system alert serve as an error code.
When the lights begin to blink, you can not know the cause of the error code just by the lights, so you should press a series of keys, after which your machine will enter the diagnostic mode.
Sometimes, the lights will stop blinking when the machine enters diagnostic mode. But that is only when the machine does not have any additional faults.
How Do I Run A Diagnostic Test On My Kenmore Dishwasher?
When there is an error code on your Kenmore dishwasher, you have to run a diagnostic test to determine the issue your dishwasher has because the error code will not tell the cause or what is making the dishwasher lights flash.
So, to run the diagnostic test or diagnostic cycle, you need to follow this simple procedure. Press the heated dry button and the normal wash button in quick succession.
Heated dry once, then normal wash, then heated dry once again, and finally normal wash. Remember that you need to press these buttons one after the other and in quick succession.
Once you’ve done that, the process should activate the dishwasher diagnostic test mode. Once the test mode turns on, all the lights on your dishwasher should illuminate.
The lights turning on is a sure sign that your dishwasher is now in diagnostic mode.
Once the dishwasher enters diagnostic mode, all the lights on the dishwasher illuminate, so close the doors and wait for some minutes.
During this time, the dishwasher carries out a sequence of tests on its own to determine the exact issue and fix it if possible.
However, while that is happening, you also need to follow the process; it will help you know some vital things as the dishwasher goes through the self-diagnostic procedure.
Usually, if the dishwasher can fix the issues, the blinking lights go off.
However, that doesn’t happen every time. So when you resolve all the issues but the lights continue blinking, you’ll need to do other repairs on the machine.
Of course, the fixes you carry out will depend on the results of the diagnostic mode that the machine ran or the problem that the diagnostic mode revealed.
#1. Kenmore Dishwasher Diagnostic Code
Kenmore dishwashers have several diagnostic codes or error codes, which are like pointers to the issues with the dishwashers.
All Kenmore dishwashers have built-in diagnostics systems, so when the dishwasher develops a fault, it will display an error.
The LED lights will flash; when a particular LED light or error code is flashing, your system alerts you to a specific fault.
If your dishwasher is a digital display model, the error codes will show on the control panel; if it doesn’t have that feature, it communicates the errors by flashing the lights in a unique pattern.
But first, let us look at the error codes displayed on the
#1. 1-1 or F1E1
This code means a stuck relay on the electronic control board.
If your control panel displays this code, shut off the machine for about 5 minutes.
If you turn it on and the error code is still there, check the wiring connected to the control board; if you find any broken or damaged wires, make sure you repair them.
#2. 1-2 Or F1E2
When this code is displayed, the memory on the control board is damaged or corrupted. Or there are incompatible software components on the microprocessor.
To fix it, shut off the dishwasher’s power for 5 minutes. If you turn it on and the problem resumes, you’ll have to replace the electronic control board.
#3. 2-1 or F2E1
When this code shows, a button in the user interface control is stuck. Carefully check all the buttons on the interface control to see which one is faulty.
#4. 2-2 or F2E2
This error means the user interface has difficulty communicating with the electronic control board.
Disconnect the dishwasher and check all the wires and connections between the user interface and electronic control board; if everything is in order, you have to replace the user interface control board; if the problem persists, replace the electronic control board.
#5. 3-1 or F3E1
Thermistor or OWI sensor failure. The thermistor is the dishwasher water pressure sensor, and the OWI is the Optical Water Indicator responsible for indicating the quantity of debris in the water.
#6. 3-2 or F3E2
A shorted thermistor or OWI sensor. If that’s the issue with the dishwasher, disconnect the machine and check the wires and connections between the electronic control board and the thermistor or OWI sensor.
#7. 3-3 or F3E3
OWI calibration malfunction or drain hose check valve failed, allowing dirty water to backflow into the dishwasher.
#8. 4-1 or F4E1
The circulation pump motor and the electronic control board are malfunctioning. You must check the circulation pump wire harness, replace any damaged wires, and reconnect loose wires.
#9. 5-1 Or F5E1
This code means door switch failure; this usually happens when you don’t close the door within a few seconds of starting the wash cycle or if the door latch assembly breaks.
#10. 5-2 Or F5E2
This code shows when controls detect that the doors are not opening.
When the electronic control board cannot detect the door closing and opening between cycles, the next time you try to start a cycle, the machine will not work.
#11. 6-1 Or F6E1
The dishwasher won’t fill because something remains stuck under the overfill float. You need to find the item and remove it.
#12. 6-2 Or F6E2
This error code indicates water inlet valve failure, disconnect electrical power from the dishwasher and remove the toe panel and the front access panel.
Check the connection on the water inlet valve and reconnect any loose wires.
#13. 7-1 Or F7E1
If the heating element is malfunctioning, disconnect the washer, inspect the heating element and replace it if it is visibly damaged.
#14. 7-2 Or F7E2
The heating element won’t turn off; in this case, turn off the dishwasher for 5 minutes; if the code resumes after you turn it on, replace your electronic control board.
#15. 8-1 Or F8E1
Slow drain, disconnect power from the dishwasher, then shut off the water supply. Check for any obstruction in the drain path.
If there isn’t any, check the drain pump wiring; if it’s still intact, you may have to replace the drain pump.
Kenmore Ultra Wash Dishwasher Diagnostic Mode
Suppose your Kenmore Ultra wash dishwasher has stopped working. Likely, you may not know what the issue with the dishwasher is.
But, to troubleshoot, reset or do DIY repairs, you’ll have to put it in diagnostic mode to know the exact cause of the fault.
To run diagnostic mode on the Kenmore ultra wash dishwasher, start by pushing the following buttons heated dry, normal wash, heated dry, normal wash, and cancel.
When you push the buttons above in the correct order, the dishwasher will reset and enter into a test mode. The way mode usually lasts for about twelve minutes.
Usually, running a diagnostics mode on the dishwasher solves the problem. However, if this generic solution does not work, there is something else you can try for your Ultra wash dishwasher.
Push any three buttons on the machine in the following sequence 123, 123, 123; push the buttons quickly, so there isn’t up to a second’s lapse.
When you do that, all the lights on the machine will turn green. Once the lights go green, close the machine door, and the “clean” light will begin to flash.
After the light has flashed for a minute, the “high temp” light will also start flashing.
When that happens, open the dishwasher door and press the high temp button. That should be enough to reset the dishwasher, after which you should end the cycle and start another.
Kenmore 665 Dishwasher Diagnostic Mode
Suppose you want to enter dishwasher diagnostic mode on your Kenmore 665 dishwasher or even Kenmore 665.127 dishwasher.
In that case, the process is almost identical to the diagnostic mode for other Kenmore dishwasher models.
Press the following buttons in rapid succession: heated dry, normal wash, heated dry, normal wash.
When you complete the sequence, close the dishwasher and latch it. It will start a short cycle, and afterward, the machine will reset.
Kenmore Elite Dishwasher Diagnostic Codes
Kenmore dishwasher error codes are useful. With them, you can troubleshoot your Kenmore Elite dishwasher if the lights on it start to blink.
But, once you resolve the issue, the panel’s error code no longer appears.
#1. Clean Light Blinks Seven Times
It means that the heater circuit is malfunctioning, and the machine’s control didn’t detect the increase in water temperature.
#2. Control Light Blinks Rapidly
The control detects a stuck button on the machine’s control panel.
#3. Start/Resume Light Blinking
If the machine is in the middle of a cycle and the door is left open, or power is interrupted, the dishwasher must detect that the door is closed and the start/resume button pressed before the cycle will continue.
#4. Clean Light Stays On
The dishwasher will not begin a new cycle unless it can detect that the door was opened after the last cycle, so open and close the door so the new cycle can begin.
#5. Control Light LED Is On But Presses Not Working
You accidentally turned on the light, or dishwasher controls detected a keypad issue.
#6. Sanitized LED Lights Blinks At The End Of Cycle
Machine controls cannot confirm whether the washer achieved sanitation water temperature.
Conclusion
Most people who own Kenmore dishwashers prefer to troubleshoot or use DIY methods to fix their washers; however, you need to know the issue with your washer. And that’s where the diagnostic mode comes in.
With the various error codes, you can determine what is causing your dishwasher to malfunction and how to fix it.