The furnace pilot light is the spark every gas furnace needs to serve its purpose. Safely and automatically, at least.
That is because the furnace pilot light ignites the gas in the furnace, thereby producing heat. The thermocouple links gas flow and pilot light in the gas furnace system.
Thus, it’s an exceedingly important safety measure. When the thermocouple is faulty, the gas furnace won’t work as it should.
That’s because it won’t be able to detect when the pilot light is on or not anymore.
Also, the thermocouple is a delicate part that loses its function over time. So, replacing the thermocouple is unavoidable.
Sometimes the pilot light doesn’t stay lit after you replace the thermocouple and relight the pilot light. Likely, you didn’t install the new thermocouple correctly. But that’s not the only culprit. A faulty gas valve and dirt in the furnace may also cause the pilot light not to stay lit.
Five Reasons Furnace Pilot Light Won’t Stay Lit After Replacing Thermocouple
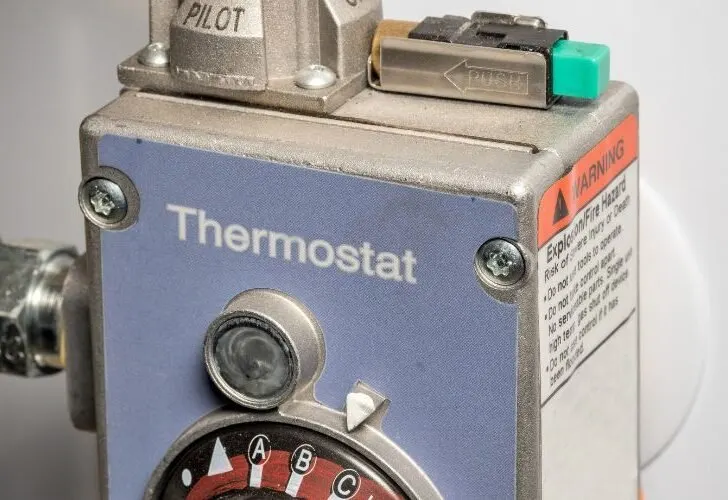
The pilot burner is likely dirty if the furnace pilot light won’t stay lit after changing the thermocouple
It could be due to a faulty part within the gas furnace system. But the culprit is usually not out of reach after a few checks.
Below are the most frequent reasons why the furnace pilot light won’t stay lit after you change the thermocouple.
#1. Dirt Piled In the Pilot Burner
Dirt is the number one culprit, anytime, any day. After installation, you can count on dirt to pile up in the gas furnace.
But routine cleaning helps put that in check. For example, the pilot burner won’t function properly with dirt piled up in its orifice.
The same goes for the thermocouple, but that’s not the question in this case. You just replaced it.
#2. An Error Made When Installing the Thermocouple
Incorrect installation of the thermocouple will cause the gas valve to act up. That does not mean a fault with the thermocouple, only its placement.
If the thermocouple is loose, that will affect how it functions. It must always be in firm contact with the gas valve. If that changes, the gas valve will not get clear signals on when to supply gas.
#3. A Fault with the Gas Valve
The pilot light won’t stay lit if it doesn’t get a constant gas supply. The gas supply to the pilot light comes from the gas valve.
So, after you relight the pilot light, it won’t stay lit when the gas supply takes a hit. In the gas valve, a magnet blocks/allows gas flow in the valve.
If it stays blocked, gas won’t flow to the furnace and the pilot light. If the magnet functions well, you must inspect other gas valve parts.
#4. A Defect in the New Thermocouple
You may get a defective piece of equipment straight from the factory. That can also happen with the thermocouple.
So, if the thermocouple is defective, it’ll also affect the gas flow in the furnace. If that happens, the pilot light will not stay lit due to a clamp on the gas supply.
#5. The Furnace Draft Hood is Out of Position
The draft hood is responsible for cooling the gas furnace. It controls airflow into the furnace so it can cool down when it gets too hot.
If the calibration is off, the pilot light will go off due to too much air in the furnace.
Also, replacing the thermocouple sometimes knocks the draft hood out of position. So, you must always ensure the draft hood is in its natural position.
How Do You Fix a Pilot That Won’t Stay Lit? (Step by Step)
After diagnosis and discovering why the pilot light won’t stay lit, fixing the problem becomes more effortless.
Just match up the steps below to resolve any possible reasons why the pilot light won’t stay lit.
#1. Cleaning the Pilot Burner
- First, unscrew the bolts that keep the pilot tube in place, and take it out. It would help if you removed the setup’s pilot tube to clean the orifice. The orifice is where you should focus most when cleaning the dirt.
- Use a wide-bristle brush to clean around the surface of the burner.
- You can use a brush and sandpaper to clean off the dirt build-up for the tip of the orifice.
- After that, utilize a thin, soft-bristled brush for the hard-to-reach part of the orifice.
- For the best results, you can use compressed to flush the orifice. That will remove any dirt particles you couldn’t clean with the brush.
#2. Correcting Any Error with the Thermocouple Installation
- Inspect the thermocouple and observe the lead on the thermocouple. Straighten its shape to match the thermocouple if it’s bent.
- Next, ensure the proper connection between the gas valve, pilot burner, and thermocouple. First, the thermocouple goes to the pilot burner assembly bracket. Then, the gas valve goes to the thermocouple. Finally, ensure the gas valve is also correctly connected to the gas line.
- Ensure all the nuts holding the thermocouple to the gas valve are tight.
#3. Servicing/Replacing a Faulty Gas Valve
You may likely need professional assistance with this particular solution.
- Stop gas coming into the furnace.
- Use a wrench to unscrew the gas valve and remove it.
- Dirt in the gas valve can also be an issue. Ensure to clear any dirt pile up if there’s any in the gas valve.
- Check to see if the magnet in the gas valve still functions as it should. It shouldn’t stay blocked permanently but open and close when it’s supposed to.
- If the magnet is weak, you should get a new gas valve.
- Return the cleaned gas valve (or the new one) to the furnace set up. Ensure to screw all the nuts firmly.
#4. Detecting a Defect in the Thermocouple
When you detect a defect in the thermocouple, there’s only one thing to do; get a new one. This check is helpful so you can avoid installing a defective thermocouple.
It’s still helpful to ensure the thermocouple works correctly. You will need a multimeter for this check.
Don’t worry about how to use a multimeter to complete the check. It’s pretty easy.
- Unscrew the thermocouple and remove it from the furnace.
- Switch on the multimeter. Please set it to Volts and ensure the reading is at zero.
- Hold up the tip of the thermocouple close to a flame for a while. Take it off when it gets a little hot.
- Put one lead of the multimeter on the thermocouple. Next, place the second lead where the thermocouple connects to the gas valve.
- Check the reading on the multimeter. A reading of 25 millivolts or more means the thermocouple works fine. If you get lesser readings, the thermocouple is defective, and you should get a new one.
#5. Placing the Furnace Draft Hood in its Proper Position
- Inspect the draft hood and ensure it’s not loose. Confirm that it sits firmly in its place, and that’s all.
- Check the area for other entry points that would permit air. Try to block any leaks that you might notice.
After following the checks above, the flame should stay lit in your furnace when you relight the pilot light.
But, if the furnace pilot light dwindles, you may have to consider changing your furnace setup.
Williams Wall Furnace Pilot Light Won’t Stay Lit After Replacing Thermocouple?
You can also make a diagnosis for your Williams Wall Furnace with the likely culprits listed above.
The pilot light won’t stay lit after replacing the thermocouple for the same reasons. The same goes for a heater pilot light.
Below is a quick check for a Williams Wall Furnace when the pilot light won’t stay lit.
| Step | Explanation |
|---|---|
| Step One | Ensure that the gas line’s connection to the gas valve is intact. Also, ensure the gas valve functions correctly. |
| Step Two | Inspect the thermocouple to make sure the lead on it matches its shape. |
| Step Three | Ensure the thermocouple sits firmly on the pilot burner assembly bracket. |
| Step Four | Test the thermocouple using a multimeter to ensure it produces 25 millivolts or higher readings. |
| Step FiveClear the pilot tube with compressed air to remove any blockage. |
Conclusion
An incorrect installation may cause the furnace pilot light not to stay lit after replacing the thermocouple.
You can start your diagnosis there. Dirt in the pilot burner, a fault with the gas valve, or the draft hood are all likely causes.
On rare occasions, the thermocouple can be defective. Overall, professional help saves lots of time and effort.
