As a homeowner who expects a professional touch after a painting job is done in your home, paint blistering or bubbling is an unusual challenge that you may deal with and may only be discovered after the paint is applied to drywall.
This article outlines why drywall forms bubbles after a skim coat, how to get rid of bubbles on drywall and prevent them, and the methods to fix drywall.
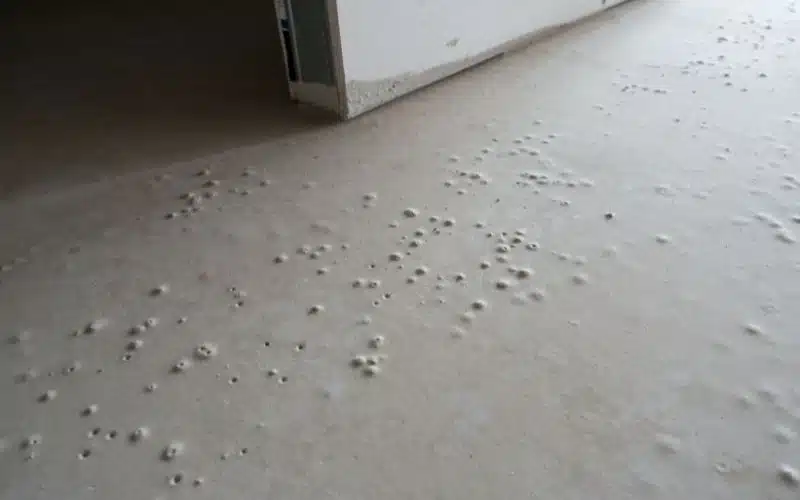
Bubbles are formed on drywall after a skim coat due to air escaping through tiny pores or cracks on the wall. Also, in areas with too low or high humidity, drywall and skim coats shrink so much that tiny fissures begin to form on their surfaces. Since bubbling is enhanced by water, the best remedy is to always prime drywalls with oil-based primers or sealers.
Six Reasons Why DryWalls Have Bubbles After Skim Coat?
 1")
Bubbles formed on the drywall after a skim coat can be extremely disturbing. Most times, potential bubbles are not easily detected even after careful examination.
Factors such as the force of adhesion between the wall and skim coat, air pressure, humidity, water, and wall fissures or cracks enhance this phenomenon.
Therefore, without further ado, let go through the possible reasons drywalls form bubbles after skim coat.
#1. Paint Rash
Paint rash, also known as pine hole, is formed when the skim coat is applied to wall surfaces.
However, the adhesive force between the drywall and skim coat is usually strong and does not relax even when moisture and heat are applied. When this happens, the skim coat peels off after some time.
#2. Fissure And Cracks
Air is likely to escape from thin skim, coated wall layers. The air escaping is usually from fissures or cracks on the walls long before the skim coat was used.
Nevertheless, fissures and microcracks are often seen on the surfaces of drywalls, primarily because of the air escaping from the walls.
However, fissures or cracks on the wall can be controlled by adjusting the rollers and techniques used in painting. This also goes a long way to reducing the bubbles formed on the skim coat.
#3. Improperly Mixed Joint Compound
An improperly mixed joint compound is one of the typical reasons drywalls have bubbles after skim coating.
The joint compound is another name for mud or plaster. It comes in either dry or premixed form.
While the premixed compound is an already mixed mud, the dry compound requires you to thoroughly mix it with water to your desired thickness and texture.
To save time and convenience, the premixed drywall is prepared by a painter using a small quantity of water.
However, because they are premixed, they are more likely to create and form bubbles on drywalls after you skim coat.
These bubbles are much more difficult to notice and, therefore, always add a little extra water as you paint each time you notice it has become too thick.
#4. Old Drywalls
Drywalls are recommended for use immediately after they are purchased. However, storing the drywall could sometimes lead to over-hardening or softening when you want to use it later.
This may cause the compound to lose its adhesion force, leading to weak viscosity.
Therefore, before skimming your wall, ensure to get a new mud, or if you have a remainder from a previous job, ensure it is at least in a super good condition.
Using old mud on drywall is not only capable of causing air bubbles or walls but can also compromise the structural integrity of the walls.
#5. Adding Mud On Already Coated Walls
Ideally, compound joints are applied to new or unpainted walls, especially when there is a need to hide holes or fissures on already coated drywalls.
The chances that an already painted wall will develop bubbles when you skim coat over it is very high because painted drywalls have sealed surfaces and can neither absorb mud nor the bubbles.
Uncoated drywalls, on the other hand, are mostly paper and porous, which enables them to adhere to the mud.
Therefore, the painted drywalls seal off the new skim coat’s air and push outward, visibly appearing as bubbles.
#6. Insufficient Mud Under The Tape When Skim Coating
Beginners in the painting are more likely to make this mistake. They are tempted to press out plenty of drywall mud on the tape using the utility knife.
Unfortunately, when the mud accumulates on the walls, it does not just form bubbles but also creates a weak adhesive force that peels off or gets broken into pieces after some time.
Smoothing the tape down and pressing just the adequate amount of mud your wall needs helps to create a strong seal and tackle bubbling permanently.
#7. How Do You Get Rid Of Bubbles On A Skim Coat?
Knowing how to apply drywall mud properly is a skill that not only requires precision but also professionalism.
Apart from poor installation of drywall mud and other external factors such as humidity, water pressure, and force of adhesion, the most typical reason for air bubbles on the drywall is improper paper tape installation.
Nevertheless, this issue is fixable and can be resolved by following these simple steps:
#1. Scrape Out The Tape
Carve out a cut below and above the bubbled area. After this, use a taping knife to remove the scrap out of the tape.
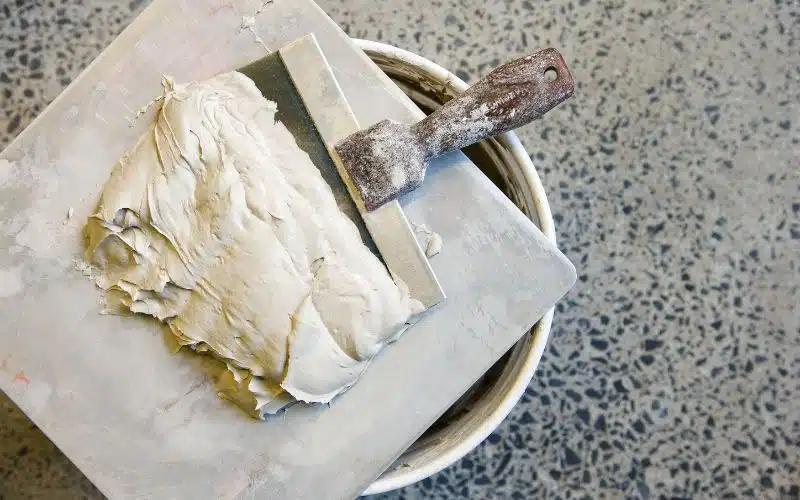
#2. Mix The Mud Thoroughly
Ensure to mix the drywall mud properly to have an even creamy mix. Then apply the mud over the paper tape and below the bubbled area. Make sure that the layer of the mud is wider than the tape.
#3. Add Extra Coat
After this, apply the mud in layers. There are three layers required when coat skimming. The first coat is applied and skimmed to create a solid base to stay on the walls. Next, you can use a utility knife to apply the mud at an angle of 45 degrees.
#4. Use Dish Wash Solution
Most professional painters use the dish wash trick to reduce the chances of bubbles forming on the drywalls. It may seem like an old trick but is highly effective in the skim coating.
How Do You Prevent Bubbles From Forming In a Skin Coat?
The first thing you need to understand when skim coating your wall is how premixed joint compound works because they are water-based adhesives and sealers.
They require water to give them an even mass and body weight, which means mixing it properly before use to prevent bubbling.
The texture of a properly mixed compound is that of a smooth, freshly baked cake icing. You will need to pay keen attention and concentrate on the mixture to get an even consistency.
Another important thing you should consider is using only new mold for skim coating. Avoid using old mud on drywalls that could cause over-hardening or softening.
Old mud is likely to lose its force of adhesion, increasing the chance of bubbles on your wall immediately after use.
Most professionals recommend that new mud be purchased for every new skim coating. Old mud that has been stored for some time should always be discarded.
This is important because when new mud is used, they form a very tight force of adhesion between the drywall and mud.
If you must use old or stored mud, ensure that it is at least in perfect condition. Also, always mix the mud properly to avoid spaces that could lead to bubbles.
The compound must be adequately mixed to an excellent texture. As you already know, compounds can come in dry or premixed forms.
Premixed mud is tough to handle and requires a bit of precision and care when applying it to drywalls.
When not carefully mixed, they leave tiny bubbles, holes, and even cracks on the wall. Ensure to always mix your mud thoroughly before use.
How to Fix a Bad Skim Coat?
Skim coating is a level five drywall finishing touch. When using a joint compound, it gives a smoothing surface to the drywall.
It is also necessary to repair damaged walls and enhance the appearance of walls. They are applied in three layers.
The first two coats usually create the base for the third layer, which is the final layer. However, a skin coat is not resistant to getting sinister or even wearing.
A bad skim coat can be fixed by:
- Adding extra layers of joint compound to the drywall
- Covering the visible holes and cracks on the skim coat with mud
- Using oil primers to enhance the force of adhesion on the loose drywall papers
Some tools used in fixing a damaged skim coat include;
- Utility knife
- Roller sleeve
- Safety goggles
- Paintbrush
- Sandpapers
- Mud pan
- Squeegee trowel
- Masking tape
- Roller sleeve
Conclusion
Bubbles on drywall appear due to paint rashes, cracks, holes, fissures, improperly mixed joint compound, and old mud for skim coating.
However, you can get rid of bubbles on walls by priming them with oil-based primers and sealers, properly mixing premixed mud, or dissolving liquid dish soap in water and adding it into the compound mix.