If you own any type of sunbeam microwave, you must know how tricky setting the clock can be.
However, if you don’t do it properly, it may result in many unwanted situations, such as frequent cooking issues and spoiling the clock.
Getting the timing on your microwave right is essential as it will aid proper use and is less frustrating to use. That said, below are the steps to get it done.
Firstly, tap on the clock pad or button on the body of your microwave. Next, input the correct time on the clock pad when the clock has entered waiting mode. For example, if the time is 3:30, click on 3,3,0, which will adjust. Lastly, tap on the clock to lock in the time.
In this article, I’ll walk you through the step-by-step process of setting the time on your sunbeam microwave clock. I’ll then teach you how to fix the clock on your appliance.
Guide to Setting the Time on Your Sunbeam Microwave

Most typical microwaves do not have a clock feature on them. Therefore, it is common to need help setting the clock on a microwave when you finally buy one with a clock feature.
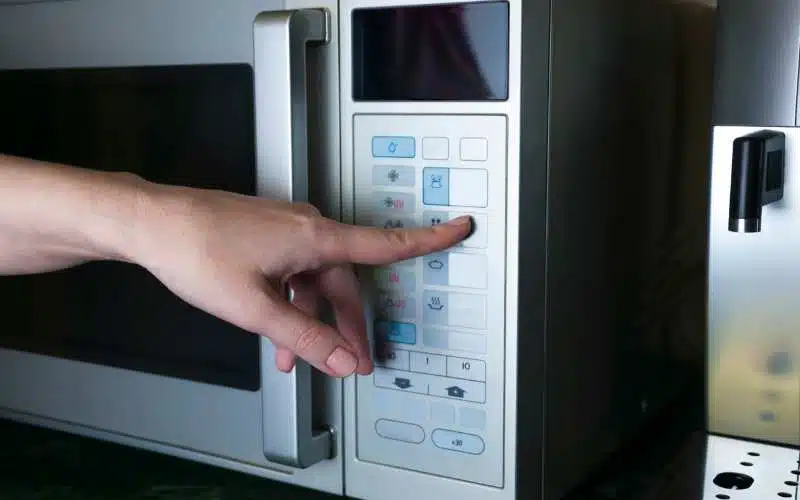
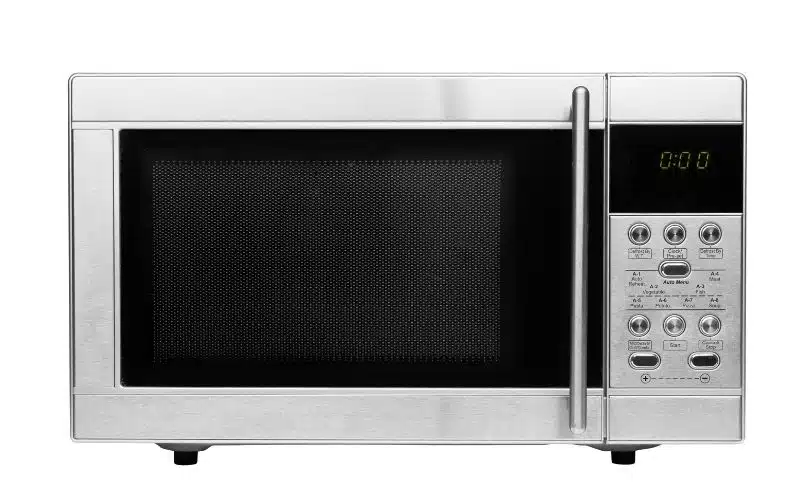
#1. Locate the “Clock” Button
For many sunbeam microwaves, the operational buttons are usually on the last right-hand side, towards the end of the equipment’s frame. Then the clock button is usually the previous button below.
If your microwave is not designed in this form, you must check the body or read your user manual to locate the clock button.
For other microwaves that do not have buttons, touch the screen pad to see the options/ features installed.
From there, you can then trace the clock icon. It may either be in writing or the form of a clock image icon.
#2. Confirm What Hour Setting the Microwave is In
Clock settings can either be in 24 hours setting or 12 hours. You have to confirm which one your microwave is set to and reset it if necessary.
If you don’t confirm the hour settings, your clock is probably 12 hours ahead or behind after you have set the time.
To set the hour, click on the clock button again, which will range from 12 to 24 or vice versa.
During this procedure, the display on the clock should read “hr: 12” or “hr: 24”. If it does not read like that when trying to adjust the hour settings, it means you are not doing it correctly.
Supposing you don’t know the default hour settings on your sunbeam microwave, you should revert to your user manual.
#3. Set the Time
Having done all the previously mentioned things, you can now comfortably set the time on your microwave.
You can do this in the following steps:
- Watch the time closely on your phone, wristwatch, wall clock, etc.
- Wait for the time to enter a new minute before you set on the microwave.
- When you notice the time has moved by a new minute, input it into the microwave’s clock.
- After inputting the time, tap the clock button again so it locks in.
Setting or resetting the clock on your sunbeam microwave is as easy as you have seen.
If you want to set the clock as a timer to either warm food, make popcorn or do anything you need, here is how to go about it.
- Tap on the kitchen timer button.
- Use the number pads to enter the time you want it to last.
- Tap on the kitchen timer button again to confirm the time.
Remember that you can only cook in a sunbeam microwave for as long as 99 minutes and 99 seconds.
If you want to cancel the timer and stop cooking, hold on to the kitchen timer button for 3 seconds, which will automatically cancel the operation.
Why Won’t the Clock on My Sunbeam Microwave Set?
Despite being an easy process and a simple feature, your sunbeam microwave clock will sometimes knock out and will likely stop responding to queries. In times like this, you will most likely experience a few issues.
For example, here are a few:
- A work and stop clock.
- The clock is completely not working.
- Irresponsive timer.
- The clock refused to set.
All these are common issues you can face with the sunbeam microwave, making setting it difficult or impossible. A few things can result in your sunbeam microwave clock refusing to set.
Some of them include the following:
- Reserved Voltage in the Circuit
- Faulty Control Board
- Busted Power Supply
- Defective controller.
- Power surges.
How Do I Fix the Clock on My Sunbeam Microwave?
I will take you through the necessary steps to fix any issues with your microwave.
To do this, however, you will need a few tools. Luckily, they are a few standard tools you will most likely have at home.
These tools around the house can come in handy, especially when you have a highly or slightly sophisticated machine like the sunbeam microwave.
#1. Tools Needed to Fix the Sunbeam Microwave Clock
- Electrician screwdrivers.
- Multimeter.
- Electrician plier.
- Necessary replacement parts.
- Owner’s guide/ manual.
- High Voltage Capacitors Discharging Tools.
Fixing the clock on your sunbeam microwave is a complex process. Unfortunately, this means you will have to identify the problem that stopped the clock before you can know what to fix.
But, if you have identified the issue of your microwave clock to any of the problems listed above, here are a few possible fixing methods.
#2. Fixing Busted Electricity Supply
A power cord goes from the wall into your microwave. You will likely experience shorts that reset your microwave clock when this cord gets damaged.
After frequent resetting, the clock could only work if this issue is considered. Nevertheless, this is the best way to replace your sunbeam microwave electrical power supply.
- Disconnect the microwave from its power source. (Unplug it).
- Take out your microwave’s back panel using the screwdriver.
- Discharge high voltage capacitors safely.
- Find the cable connecting the microwave to the power supply, and ensure you disconnect it.
- The microwave’s metal base has a wire in the ground that connects it to the power supply. Once you have found the wire, screw it.
- Plant your fresh power supply into the provision made for it.
- Join the screw back and grounding wire to the microwave’s metal case.
- Replug your electricity supply cable back to send power into the microwave.
- Reinstall the back plate of your microwave.
- Plug the microwave and attempt to reset the clock.
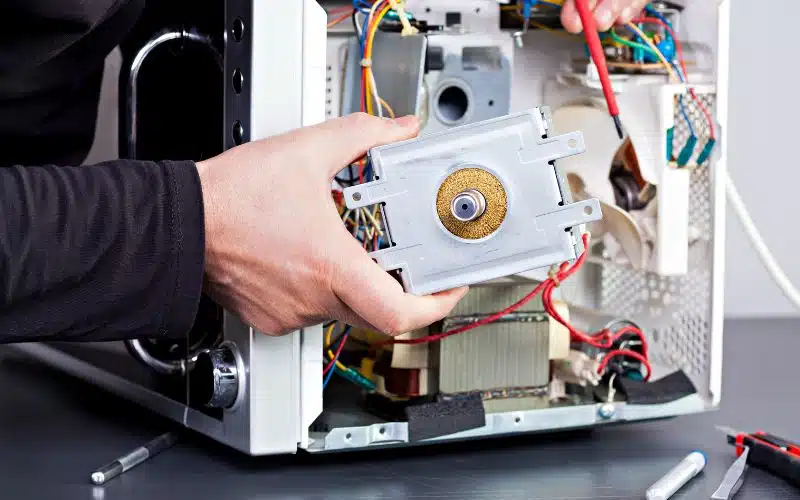
#3. Fixing a Defective Controller
Aside from the power supply, Another issue that may stop your microwave’s clock from working is a defective controller.
Defective controllers cannot be fixed by people who are not experts in the field. Therefore, you will have to replace the entire thing.
Regardless of how difficult this may sound, you can do it yourself with the easy steps below.
- Disconnect your microwave from the power source.
- Unscrew your microwave’s back panel.
- Discharge the high-voltage capacitor.
- Trace the control board. Some microwaves have it behind their front panels, while others are inside the machine’s body.
- Unclog brand-new cable harnesses controlling the control board.
- Unhouse the control board with the help of your screw.
- Take the new control board and fix it into the previous one’s housing.
- Carefully screw the control board back onto the microwave.
- Join any other cable harnesses to the present control board.
- Fix the back panel back onto the microwave.
- Replug the microwave into its power source (socket) and reset the microwave clock.
#4. Fixing a Broken Display Panel
The last fix is fixing the display panel itself once it’s broken. There is a probability it will not shut off completely when it has a problem.
However, it is likely not to display the current or correct time. Just follow these steps to replace the old display panel on a microwave.
Note: The display panel is directly connected to the microwave’s control panel.
Here are the steps:
- Unplug the microwave.
- Unscrew the microwave’s back panel.
- Unhouse, the control panel.
- Disconnect the control board from the panel and set it aside.
- If there are any attached cable harnesses, unplug the control board from them. If it is attached to the microwave’s control panel, that is.
- Separate the control panel and control board.
- Carefully attach the old control board to the new control panel you bought.
- Screw back into place the control panel.
- Fix the back panel back onto the microwave.
- Replug your microwave, and reset the clock.
These are the most common issues that could stop your microwave’s clock from working or affect the setting. But, with these easy-fix tips, you’re sure to handle the problem like a pro.
There are a few pros and cons to calling a professional immediately when you notice an issue with your microwave clock.
Below is a tabular illustration of them.
| Pros | Cons |
|---|---|
| You may end up complicating some issues because of zero expertise. | You may pay extra fees for issues you could have fixed yourself. |
| Other issues you didn’t know of can get fixed. | Time-consuming, as you may have to book appointments. |
| You stand a chance at getting a new microwave if you contact the company. | Some experts will have to take your microwave away for fixing. |
Nevertheless, if you are ever confused or have repeated issues, you should call a professional to take a look.
To make fixing the problem easier, always keep your owner’s guide at hand and look inside to know some of the names of the parts. Enjoy your microwave in whole again!
Summary
In summary, setting the sunbeam microwave clock is as easy as:
- Pressing the clock button.
- Next, insert the time using the hour settings the microwave is in.
- And finally, tap the clock button again to confirm the set time.
If you follow these steps, the procedure will take less or at least 3 minutes.