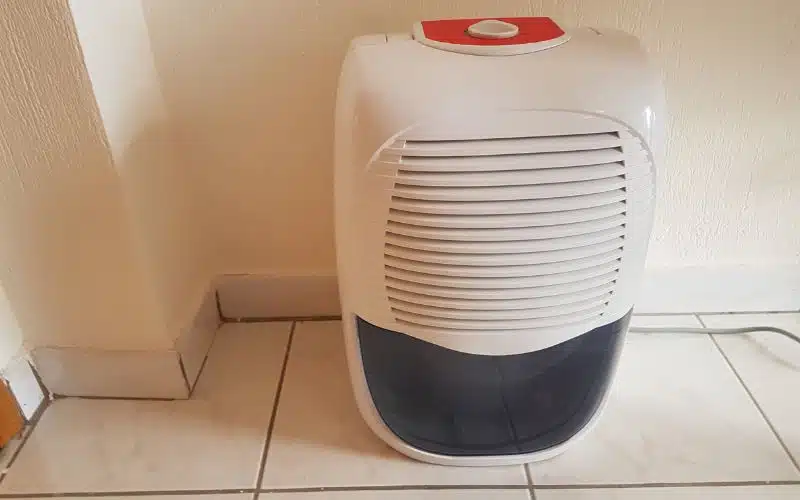
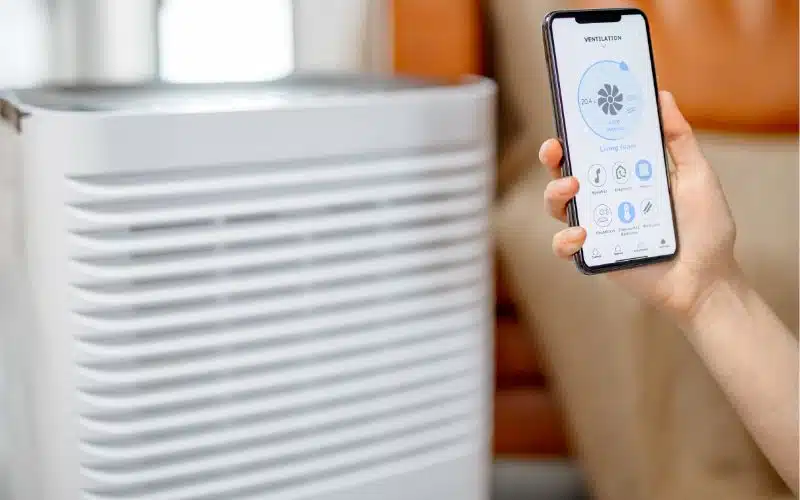
A dehumidifier extracts moisture from your home’s air. This job can get the dehumidifier’s components dirty, so they’ll need maintenance.
It’s an easy task cleaning the coils on a Hisense Dehumidifier. You need to reach into the appliance and properly attend to it.
With just some tools, you can perform this maintenance without any problems. Below, you’ll understand how to clean and maintain your Hisense Dehumidifier.
The first step to cleaning coils on the Hisense dehumidifier is to disconnect the device. Next is draining away the tank to avoid water damage. Then, you take apart the dehumidifier to reach the coil so you can clean any dirt on the surface. Further cleaning includes pouring coil cleanser on the blades and scrubbing it off.
The article below will explain how you can clean the coils on a Hisense dehumidifier. Also, you’ll learn where the coils are and when to clean your dehumidifier.
Additionally, you’ll read how you can clean other dehumidifier components.
Where Are The Coils Located On a Hisense Dehumidifier?

You can find the coils of a Hisense dehumidifier inside it. The coil will be visible when you open and unscrew the panels of the humidifier and unplug the connector.
Dehumidifier coils contain a compressor coil and an evaporator coil. Air goes through the dehumidifier and then the compressor coil.
5 Steps to Clean the Coils on a Hisense Dehumidifier
You must get tools to assist you in cleaning the coils on a Hisense dehumidifier. The coils are within the appliance; therefore, you must open it to access the coil.
The following tools will help you complete the task.
| Tool | Use |
|---|---|
| Screwdriver | For undoing the bolts. |
| Coil brush | For wiping dirt off coils. |
| Detergent | To wash dirt. |
| Vacuum cleaner | To suck out the dirt. |
The steps below will guide you in cleaning your dehumidifier’s coils.
Step 1: Gather Your Tools and Unplug the Dehumidifier
Make sure your tools are ready and accessible to use. The right tools will make your job easier and neater. When the tools are ready, unplug the device from its power source.
Once unplugged, you reduce the risk of receiving an electric shock from the device.
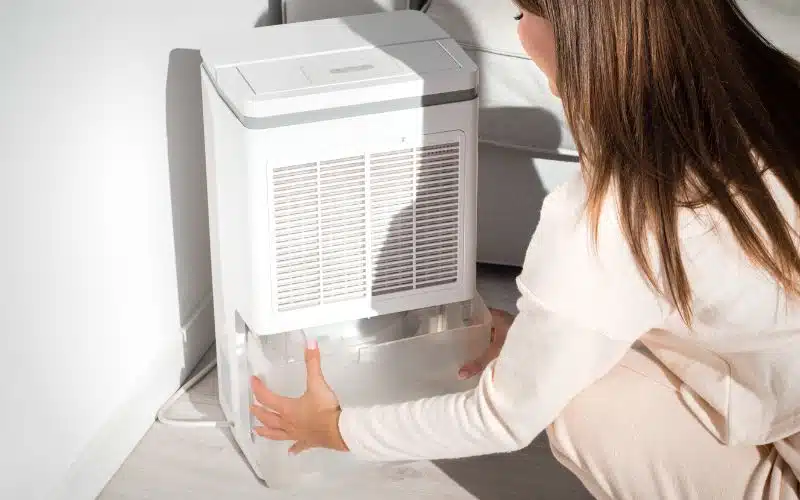
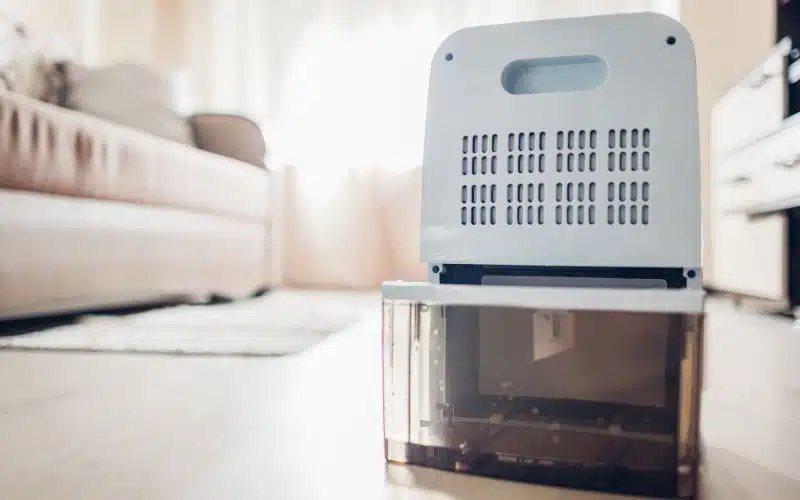
Step 2: Drain the Water Chamber and Dismantle the Dehumidifier
Let out all the water inside the dehumidifier, then pick up your screwdriver. Undo the bolts at the back, both sides, and the top of the appliance.
Next, unplug the connector, then pull out the fan to access the coil.
Step 3: Wipe Dirt from the Surface
Use a good coil brush and wipe the dust from the fan blades. Brush off the dirt from the coils using an up-and-down motion.
The vacuum cleaner can also be helpful. Use it to suck up the various particles from the coil.
Step 4: Apply Detergent on the Blades and Coil
Brushes can’t wipe away all the dust. Even a vacuum cleaner can’t do it all. You’ll need to apply detergent by spraying it on the fins.
Leave the detergent for some time before scrubbing off the remaining dirt and soot. Brush off the blades several times so every piece of dirt comes off.
Apply coil cleaner on the coil and wait so it dissolves in the dirt. You can apply vinegar if your coil has mold spore growth.
After about thirty minutes, you can scrub the coil thoroughly.
Step 5: Rinse Off and Air Dry
When you’re done scrubbing, you can rinse off the lather from the coil using clear water. Make sure you dry it off using a rag.
Some coils don’t need rinsing; in this case, you can wipe off the foam with a cloth. After the coil dries, you can assemble the dehumidifier and screw in all the panels.
How Do You Know When to Clean Your Hisense Dehumidifier Coils?
Your Hisense dehumidifier needs cleaning at least every two weeks. The dehumidifier needs regular maintenance because it pulls in dirt.
A dehumidifier draws humid air using intake vents, expels the air’s moistness, and then dissipates dry air into the home.
It has a similar working principle to an A/C unit, just that the air that goes in doesn’t come out colder.
Maintaining the dehumidifier means paying close attention to the air sieve, evaporator coil, and water chamber.
Air goes through the filter to remove dirt and additional airborne particles. The air then moves through the icy evaporator coil, which converts the air’s moisture into water.
The water then gathers in the water chamber. The first step to maintenance is by thawing the evaporator coil. A dehumidifier’s evaporator coil has a refrigerant.
When temperatures are under 18°C, the coil’s surface gets an ice layer. Naturally, the coil defrosts routinely, although you should prevent this from happening.
The reason is the process lessens the dehumidifier’s efficiency. Shut down the dehumidifier whenever the temperature falls under 5°C.
Also, maintain an 8-inch space between the wall and the dehumidifier so air can travel properly.
With decent airflow, the dehumidifier will operate more efficiently, and its components will have extended life.
Additionally, many humidifiers shut down automatically anytime the water chamber is full. This action prevents the chamber from spilling over.
However, not all dehumidifiers have this drain feature. Therefore, if yours doesn’t have one, you’ll have to drain the chamber by hand.
How Do You Clean the Interior of Your Hisense Dehumidifier?
The first step to cleaning your Hisense dehumidifier’s interior is unplugging it from the power supply.
Then, you can open it and clean the components in the unit. You need some items to help you clean the dehumidifier’s interior.
The following are some items that will help you clean the dehumidifier.
- Water
- Soap
- White vinegar
- A soft rag
- Gloves
- Goggles
Ideally, you should clean the air sieve after two weeks. Although, you can clean it anytime the air sieve’s indicator illuminates on the appliance’s control panel.
The reason is that the rate of cleaning the air sieve depends on factors like air quality and how often the dehumidifier runs.
The following steps will guide you on how to clean your Hisense humidifier’s interior.
Step 1: Unplug the Appliance and Remove the Air Sieve
Unplug the appliance from its power supply so you can safely clean it. You can find the air sieve just before the air vent behind the dehumidifier.
Pull out the air sieve with your hand to properly clean it.
Step 2: Wash the Air Sieve
Observe if the sieve is dirty; if it’s not filthy, use clear water and rinse it until it’s clean. However, if it’s too dirty, you can use a vacuum cleaner to suck up the dirt and grime.
You can then use detergent to wash strong impurities.
Step 3: Dry the Sieve
Keep the sieve aside so it can dry up. Do not fix the sieve into the appliance immediately after washing.
How To Clean Your Hisense Dehumidifier’s Water Sieve?
With the air sieve cleaned, the next component to clean is the water sieve. Reading from the user manual, the water sieve needs cleaning after three months.
The following steps will guide you on how to wash the water sieve.
Step 1: Shut Down the Dehumidifier and Take Out the Air Sieve
Ensure the dehumidifier is off before pulling out the air sieve so you can get space to work. You will then keep a container to hold dripping water from the water chamber connector.
Take out the connector, then tip the appliance backward to let the water drain.
Step 2: Take Out the Water Sieve and Clean
Pull the water sieve out if there isn’t water gushing out. Clean the sieves using clear water. If the water isn’t clean, you can wash it in a container filled with detergent.
When it’s clean, rinse it with clear water and allow it to dry.
How To Clean Your Hisense Dehumidifier’s Water Chamber?
The next component that requires cleaning is the water chamber. Even though the water made by the dehumidifier is neat, you’ll have to clean the chamber every two weeks.
Some contaminants, like mold spores, can find themselves inside the chamber. These contaminants flourish in such environments.
Once you perceive a musty smell from the chamber, you’ll have to wash and disinfect it.
The following steps will guide you on how to wash the water chamber.
Step 1: Disconnect the Appliance from the Wall
Ensure you unplug the appliance from the wall before you take out the chamber to empty it. An indicator light displays, notifying you when the chamber is full.
Step 2: Wash the Water Chamber
Fill just half the chamber using clear water, then add detergent. With a soft rag, scrub the chamber’s interior and make sure you reach the corners.
Pour the water away and rinse with clear water. The next step is disinfecting the chamber. Pour a 1:1 mixture of white vinegar and water into the chamber and leave for 30 minutes.
After half an hour, wash the chamber with clear water till the vinegar smell leaves. Use a dry rag to dry the chamber, then leave it to dry before fixing it inside the appliance.